DIY Kitchen Hood Cover
Welcome back to the blog for another DIY Home Project! Today we are sharing how we upgraded our basic range hood into this beautiful shiplap hood, using wood we already had on hand from previous projects! We added a new more powerful range hood fan and a new stove to finish out our dream kitchen space. Because we used left over shiplap and paint from other home projects this was truly an easy, budget-friendly kitchen makeover project! Typical for our home projects I start the process by coming up a design and look I have in mind and then Aaron brings it to life!
Since Aaron is the master builder he is going to share with you the details of this project below. If you have any questions, please leave them in the comments under our YouTube video here and we’ll do our best to reply to them as soon as we can!
How to design a kitchen hood cover
We considered a few designs for our hood box, including trying to match the cabinetry. Ultimately we decided against this because if you are attempting to match design, materials and color you need to get it exact or it would look off. We also had left over shiplap from our DIY Fireplace and Kitchen Nook, so a simple shiplap box made the most sense.
Another goal I had was to not alter the cabinetry too much, in case we ever wanted to remove this box and go back or do something else. The only permanent change I made to our existing cabinetry was to remove a small section of the moulding. In designing our new hood box, I used the manual to figure out the exact measurements. All 30” hoods are likely to be very similar in dimensions, but no guarantee, so I have learned to always follow the manual.
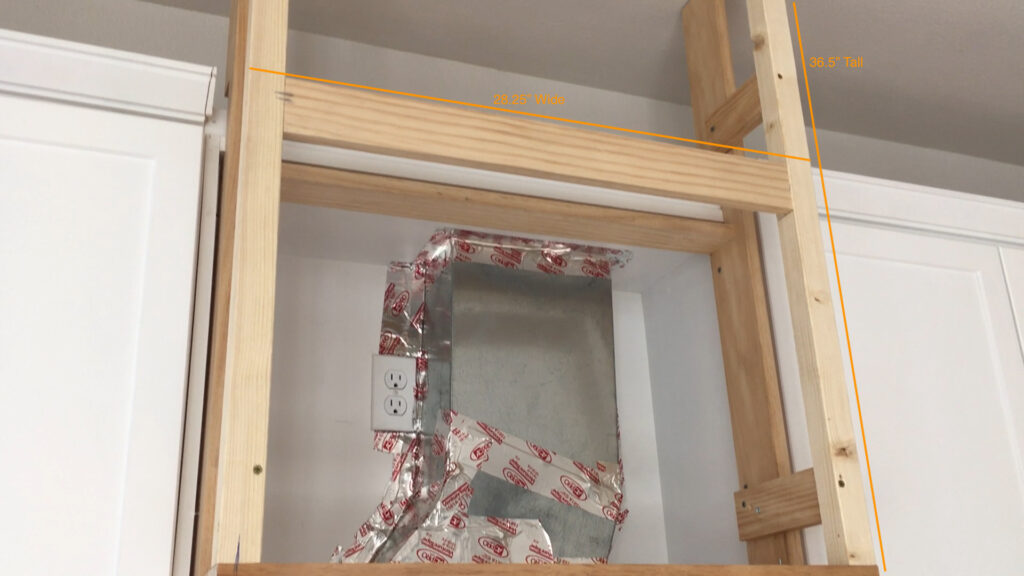
The finished dimensions of our shiplap hood box are 29.5 inches wide and 42 inches tall. The inner frame is about 28.25 inches wide, but only 36.5 inches tall, because there is no framing behind the first row of shiplap, where the hood fan is.

Demo and Hood Box Frame
The first step in the project was to remove the current cabinet doors, hinges and finally the old hood.
Next was to put together the basic frame pieces. I first made a H shape out of 1×3’s to use as the connection for my Hood Box to the cabinets. Once I had the H piece installed, I then constructed the rest of the box frame on site – versus building the whole thing in my garage and then installing it.

Our new hood fan does not screw to the underside of the cabinetry, like the previous one. All the connection screws are along the front, sides and back, but we have tile backsplash where the back screws line up. Because of this I added some thin ¼ inch wood strips. If I were to do the project again, I would use ½ inch plywood. Filling the entire back wall behind the fan, instead of small strips. I also added a few pieces of 3/4 inch by 3/4 inch square wood dowel along the bottom edge of the box frame. I did this to add extra surface area when nailing the shiplap to the frame.

Kitchen Hood Fan Upgrade
We replaced our builder grade hood fan with the Zephyr Monsoon Mini 30” which we got from Build.com (More Power! Argh-Argh-Argh). The hood fan comes with both a square and round baffle to fit whatever your cabinetry needs, I used the square.
Originally I was going to build the shiplap box and then install the fan. But I realized that it might be difficult to get the box exactly right with the corners lined up perfectly doing it this way. So instead, I screwed the first layer of shiplap to the hood fan first, then lifted the fan in place and attached the shiplap to the frame. Now that it has been installed, if I need to remove the hood fan, I can unscrew it from the shiplap and drop it out.

Shiplap Installation
Once the hood fan was level and secured in place, I installed the remaining shiplap. When installing shiplap I always use a nail gun, it is so easy and leaves only small holes. I then filled in the nail holes with spackle and caulked the edges and large gaps. Finally we painted using a basic white from our favorite ECOS Paints.
Kitchen Appliance Upgrade
We have also updated the appliances in our kitchen. The original range was always a temporary one until the range we really loved was available.
A few of the reasons why we love the GE Profile Collection range is that it has five burners and an edge to edge cooktop. We can load it up with pans for when we are cooking multiple things at once. BUT, the best feature of all and why we chose this range is the two ovens!
Sometimes we only need to cook one item in the oven such as a sheet pan of sweet potatoes. Heating up the entire oven for one sheet of food feels like a waste of heat and energy. Having 2 smaller sized ovens is perfect for when we are cooking one item at a time. It’s also nice for when we want to make multiple dishes at the same time at different temperatures!
How to Avoid a DIY Fail
When doing an electrical connection, you should always have access to that connection. Because my hood box does not open like the previous cabinetry, I cut a small access door through the side kitchen cabinet. This way I can reach the outlet and unplug the hood when I need to.

Supply list for DIY Shiplap Range Hood Cover
Here is a list of all the supplies needed to complete a similar DIY shiplap range hood cover. Simply click on each item for a link to shop!
(2) 8ft 1×3
(1) 8ft 2×2
(1) ¼” Oak Board
(1) ¾” x ¾”
#8 Screws
Wood screws
(3) 12ft Shiplap Boards
Nail Gun
Nails
Drill / Driver
Miter Saw
Oscillating Saw
Paint Roller
Foam Rollers
Paint Tray
Spackle Kit
Latex Caulk
Sanding Sponge
ECOS Paints
BEFORE…
AFTER…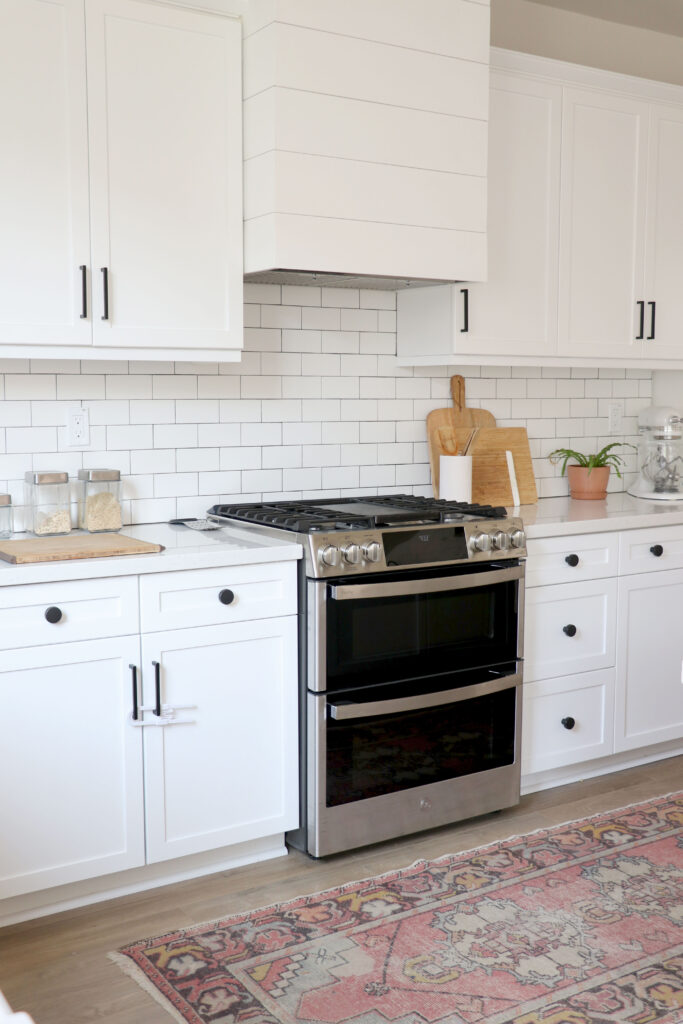
MORE HGG DIY HOME PROJECTS
If you loved this project check out our other home projects….
How To Make A Large DIY Framed Chalkboard
DIY Shiplap Wall with Floating Shelves
DIY Shiplap Electric Fireplace Build with Mantel
SHARE WITH US YOUR DIY CREATIONS!
If you make anything similar, we’d love to see! Tag us on Instagram @HealthyGroceryGirl