DIY CARDBOARD BOX PLAYHOUSE TUTORIAL
Hi Friends! Welcome back to the blog!
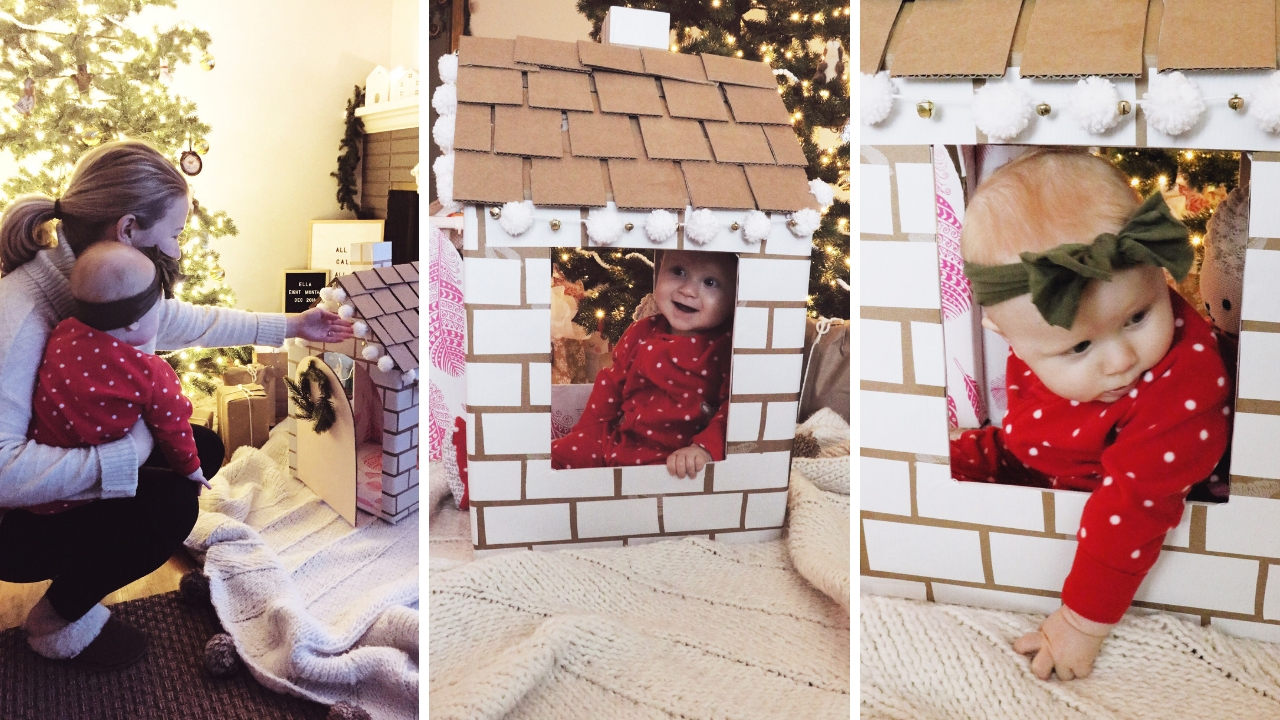
For Christmas Aaron and I decided to make a fun, surprise playhouse for Ella. It was a last minute idea and we were inspired by the adorable print on the inside of her diaper box. We worked on it week before Christmas and on Christmas morning surprised her with her first little playhouse! What I loved about this project, other than how cute it turned out, is that we used supplies we already had on hand so we spent no extra money creating this playhouse!
I shared her playhouse progress and the final house on Instagram Stories and so many of you asked how we made it! So we put together this tutorial. I wasn’t planning on sharing a tutorial while we made the playhouse so thank you for your patience with this post. I tried to explain the process as best I could and share the photos I took along the way 🙂 What I love about making a cardboard playhouse however is that it is suppose to be whimsical, fun and a great way to get creative!
Make sure to follow me on Instagram @HealthyGroceryGirl for more Food, Family & Wellness posts!
CARDBOARD PLAYHOUSE HOW TO:
BUILDING THE SHAPE OF THE HOUSE

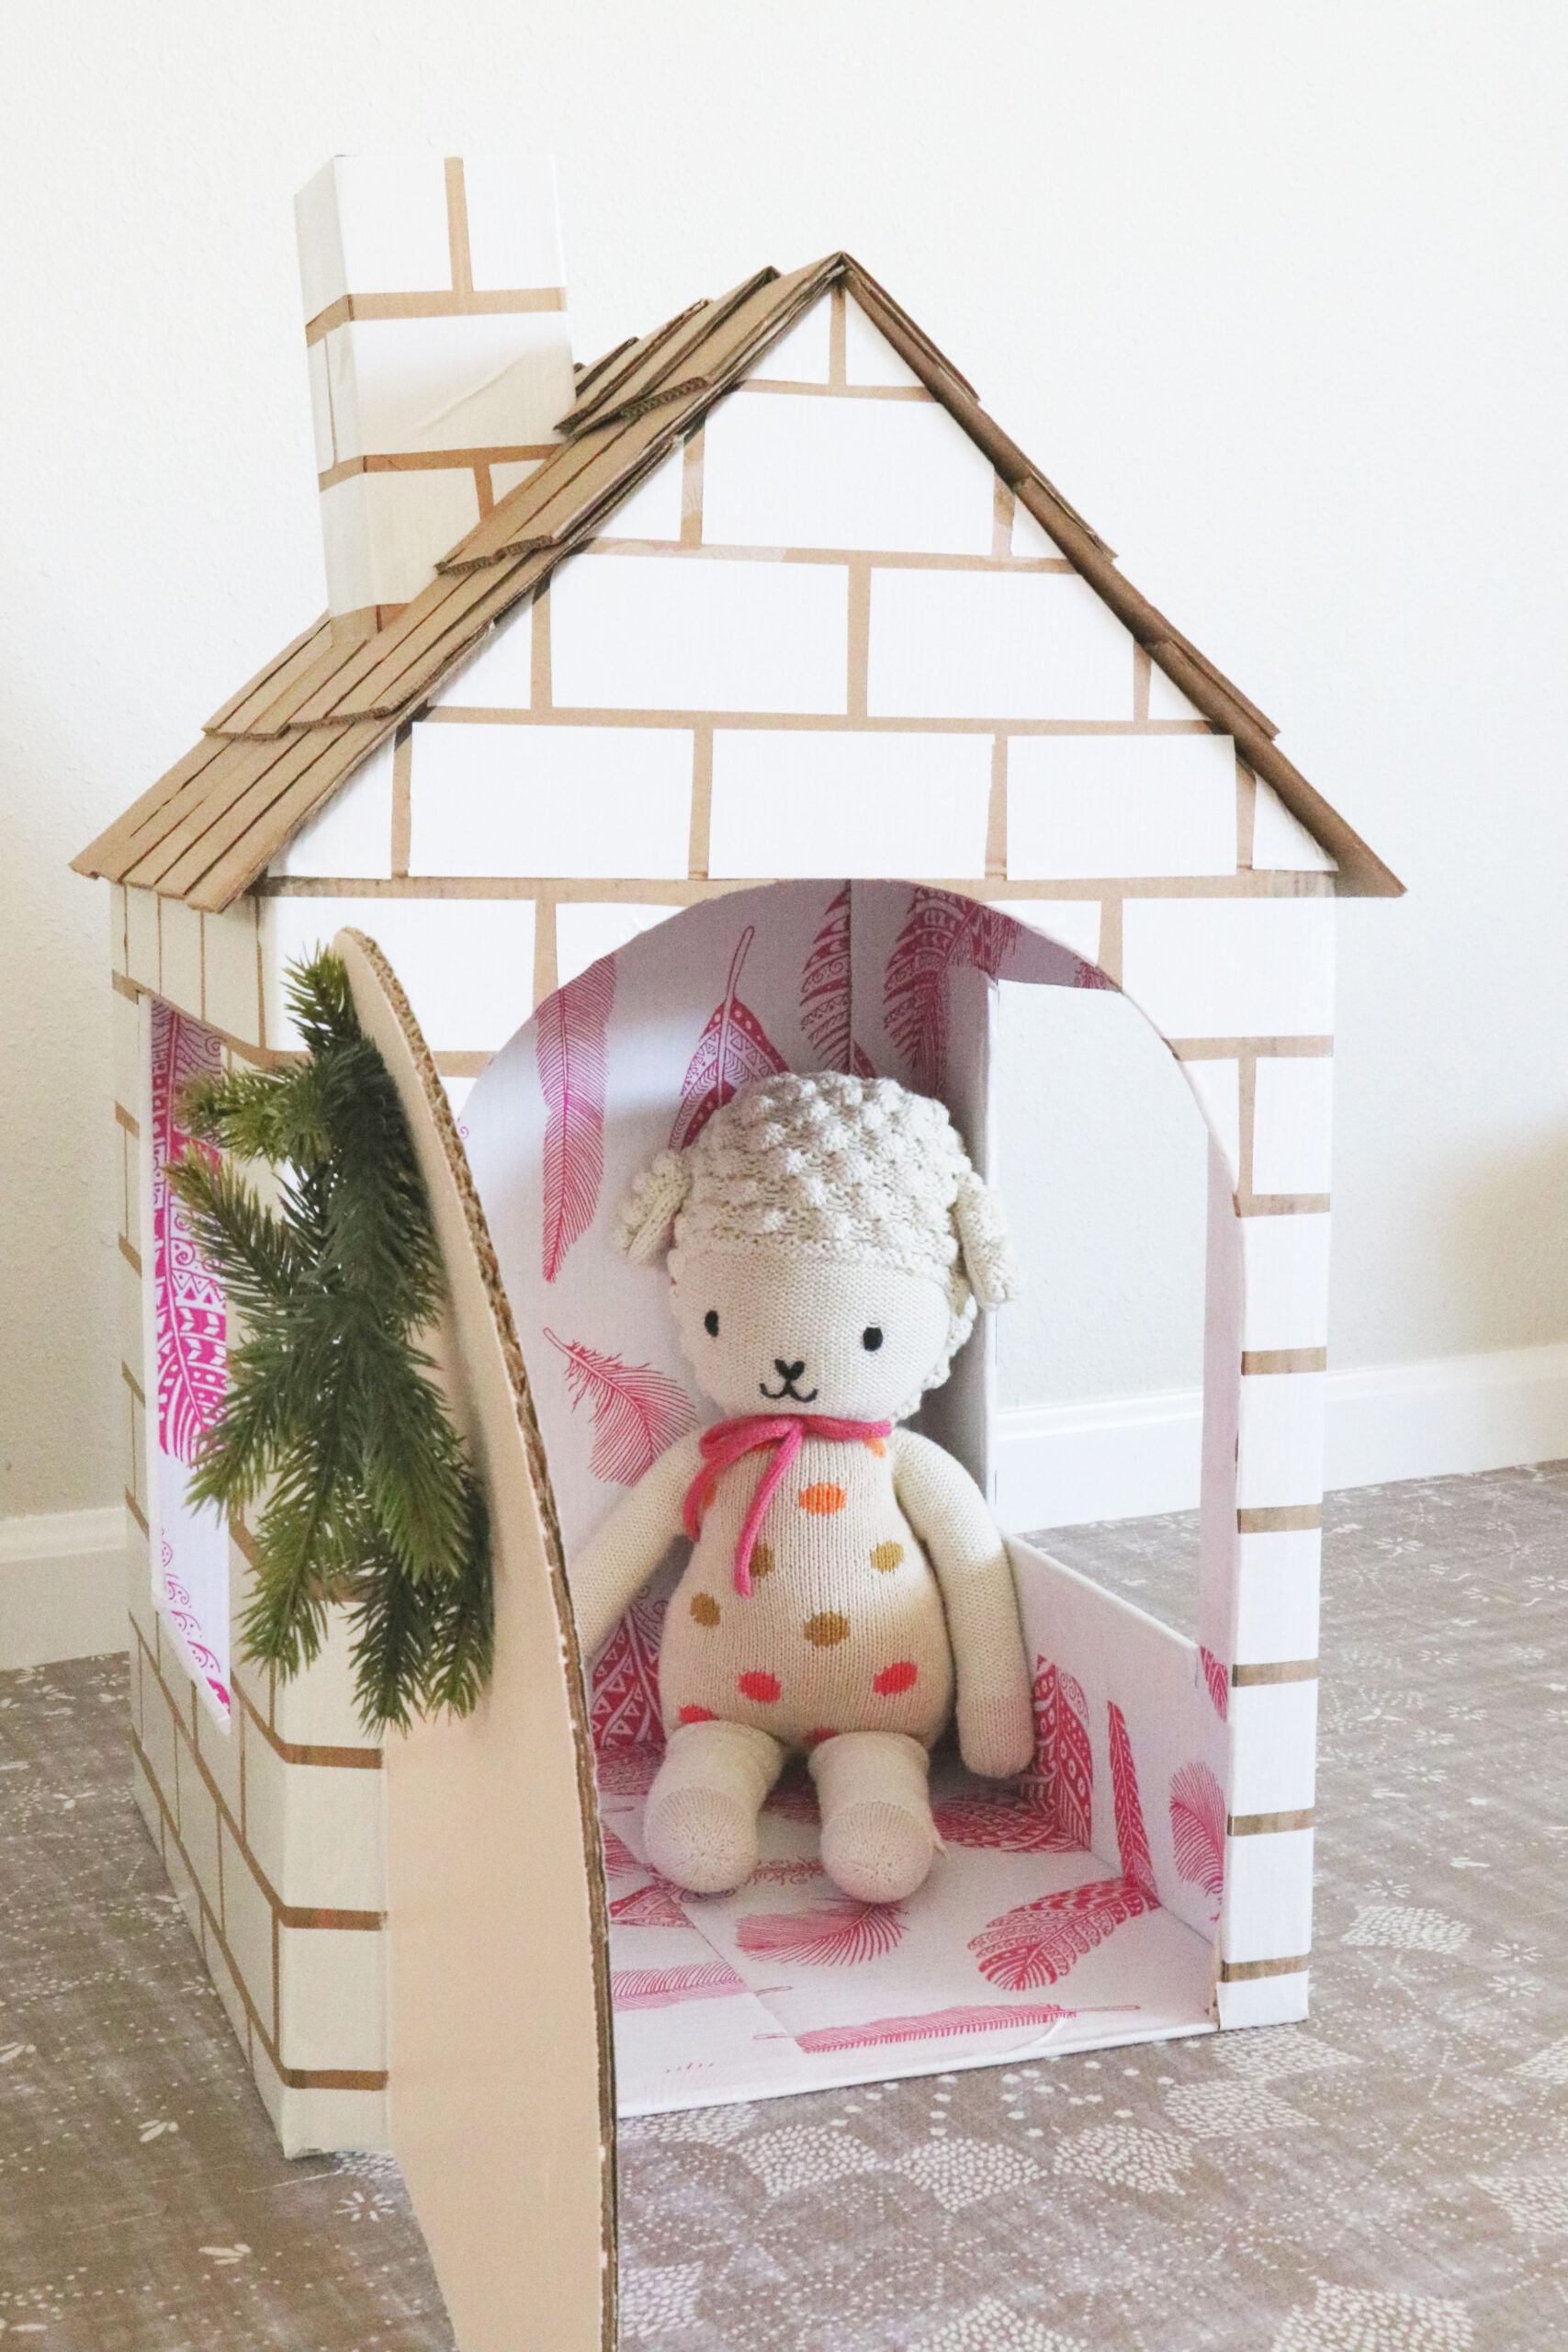
Step one was Demo-Day!! First we cleaned the outside of the box, I just used a warm damp towel and gently scrubbed the whole box. The diaper box is from Parasol! Then we drew and cut out the doors, windows and roof angles. We used a large serving platter to trace the curve of the door.
Next we glued on a few support pieces, made from scrap cardboard.
(1) There are pieces crossing the fold from the main box to the front triangle roof flap (sorry these are not visible in the photos, they are held on with the large alligator clips) these were probably not completely necessary, but they helped to strengthen the roof.
(2) Then there are small triangles (which you can see in the photos) glued on the inside of the triangle roof flaps, each with a cutout down the center. These we added to support a (cardboard) rafter.
(3) The rafter was also probably not necessary. A lot of tape would have held the roof together just as well. But Ella is really into the ‘modern farmhouse’ look and wanted an exposed beam 🙂
We let the glued support pieces dry overnight and then finished the roof by adding the rafter, gluing the flaps together and we also added a cardboard cap over the rafter to cover the holes.
“LAYING” THE BRICK
We used white duct tape to make the brick. Click here is the exact duct tape we used. Honestly it is not the highest quality / stickiest tape, but it is a good price so perfect for a project like this. We cut the tape into ‘bricks’ twice as long – as the tape is wide, to give them a classic brick shape. Do not worry about the cuts being perfect, a little imperfection adds some whimsicalness.
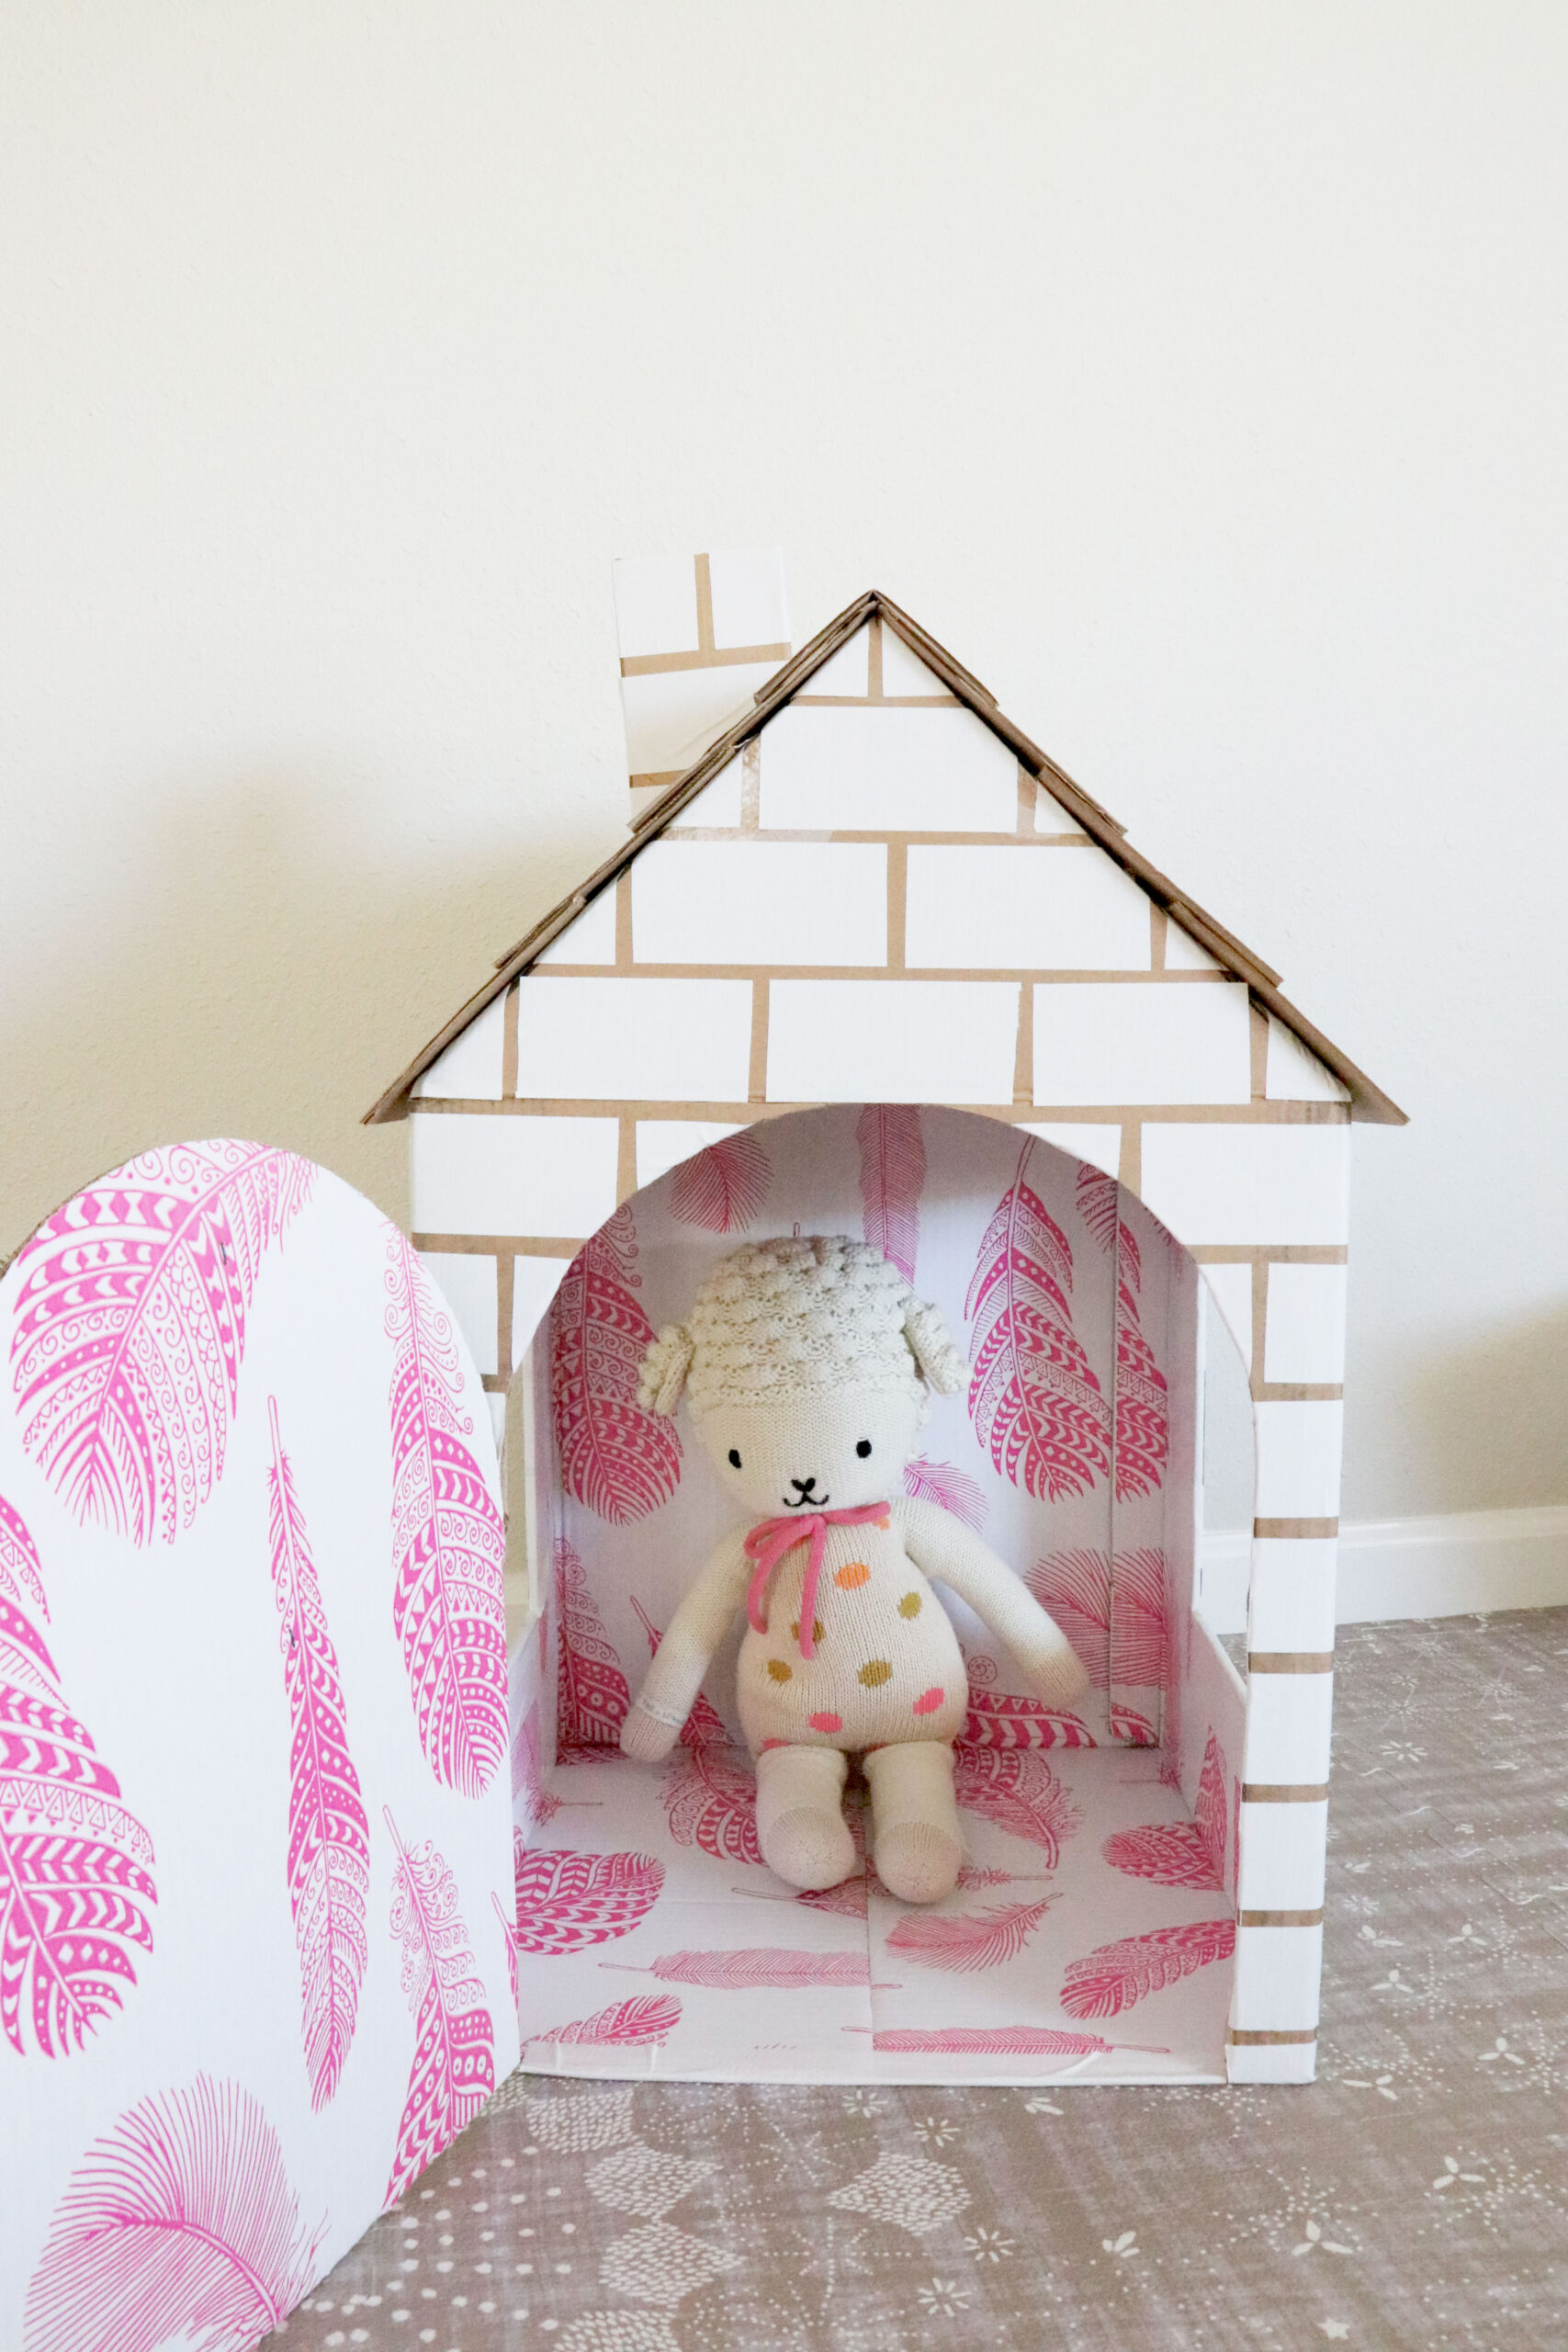
(4) The first brick laid was the one right above the peak of the door, see photo. From there we simply followed a brick pattern leaving a small gap between each brick. At this point we also made the chimney by cutting an angle off a small box and wrapping duct tape bricks around it, then glued it to the roof.
MAKING ROOF SHINGLES
Deciding on the roof shingle size was a guess, almost any size would work. To make it easier (less cuts) we found a clean, large cardboard box with flaps about 4 inches wide. We cut off the flaps and then cut them into 3 inch wide pieces, using only the flaps of the box meant they were all the same length, automatically.
We started gluing the roof shingles on along the bottom edge of both sides; we laid out one row first to figure out what spacing was needed. Then we simply glued the next row on in a brick pattern (where the gap between two pieces is the middle of one piece on the row above and below) but with the row above overlapping each row below. For the peak of the roof, we folded shingles in half and glued them on.
DOOR
We painted the door pink! It added a fun pop of color and then added a little wreath!
TIPS!
For the glue with this project we used decoupage, click here for the type we used! Decoupage is great because it drys clear and we had some left over from another project. After all the tape is down, it is a good idea to decoupage the corners and edges of the box and anywhere that the tape might easily come up, just helps keep it all together.
This truly was a last minute project so there are things I would do different next time around! While I LOVED reusing our diaper box and Ella can fit in her playhouse, it is a snug fit! I recommend using a larger cardboard box if you’re looking for a playhouse your little can walk into or move around in.
Ella is still little so this playhouse is just for fun. She likes to sit in it and stick her head out the windows and smile at us. It’s cute! However, we do not leave her unsupervised while playing or while playing in this house. Just in case any playhouse police are wondering about the safety of the playhouse… it’s not structurally sound or meant to be enjoyed unsupervised. It’s just for fun 🙂

SHARE WITH ME YOUR CREATION!
If you recreate this playhouse or use this playhouse as inspiration to create your own, I’d LOVE to see your creation! Please tag me on Instagram @HealthyGroceryGirl so I can connect with you!
Happy Cardboard Box Memory Making Friends! xx Megan